 |  |  |  |
|---|
Inside The Workshop

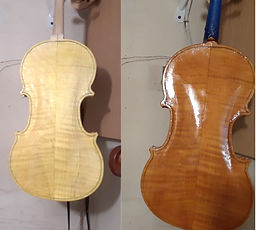
The Best Quality Wood
The best instruments start with the best wood. Tiger Striped Maple, Western Red Cedar, Curly Cherry, Walnut, and African Mahogany are just some of the wood types selected from which to carve the violins.

A Scientific Process
The belly and back of violins have to resonate together at the correct frequencies in order for the instrument to project well and sound beautiful. Careful measurements are taken, again and again throughout the process.

Making Sawdust Fly
Power tools as well as hand-carving and sanding are both used to bring the violin pieces to the correct shape. The luthier (violin maker) has to be both a craftsman and an artist.

Custom Instruments
Can't find an instrument that fits your body size? Want a unique color finish? Interested in hand-carved scrolls in the shape of an animal? Jeff not only hand makes violins, but he will work closely with you to create your dream instrument.

Choose the wood

Glue plates together

Rough outline them

Step-cut the arches


Cut, thin, bend and glue ribs to
corner blocks on the mold
Smooth arches, cut and insert purfling
Excavate the plates to
appropriate thicknesses
Fine tune the plate's resonance
Match the frequencies for
belly and back


Glue the ribs to back
Glue the belly to the ribs
Carve the neck joint and set/glue the neck
start the stain & finishing


Continue the finishing
Set the sound post and
attach all of the fittings:
Set-up the violin
Play the new instrument - help get it
broken-in and ready for the new owner
Now just waiting to get them to the students

Every violin bearing a label that tells it's wood, pattern, size, and to whom it is dedicated.
Every "f " hole is a SwanSong signature!
